At top is a cropped image of the Pinwheel Galaxy (M101) by AstroBin user Luca Marinelli. All rights reserved. Imaged through Teleskop Service ONTC 10″ f/4 Newtonian with Tele Vue Paracorr Type 2 coma corrector and ZWO ASI1600MM Pro mono camera. At right is the Tele Vue Paracorr logo. At bottom are the placement and back focus diagram for the 3″ BIG Paracorr.
In the last blog, we covered the history of the Newtonian reflector, its inherent aberrations, and how Tele Vue’s Paracorr enlarged the “sweet spot” of fast scopes to cover the entire field. We also compared the Paracorr – Newtonian combination against more “exotic” telescope designs for imaging. If you missed it, you can read Part 1 before continuing.
Which Paracorr to Use? Over the years there have been two optical versions of the Paracorr. The original Paracorr came in various mechanical designs which developed as we developed new eyepieces. For this BLOG, we’ll focus on the currently available three versions of the Type-2 Paracorr: 2″ Photo/Visual, SIPS, and 3″ Photo models. Performance improvement over the original Paracorr is most noticeable on all Newtonian/Dobsonian telescopes of f/4.5 and faster.
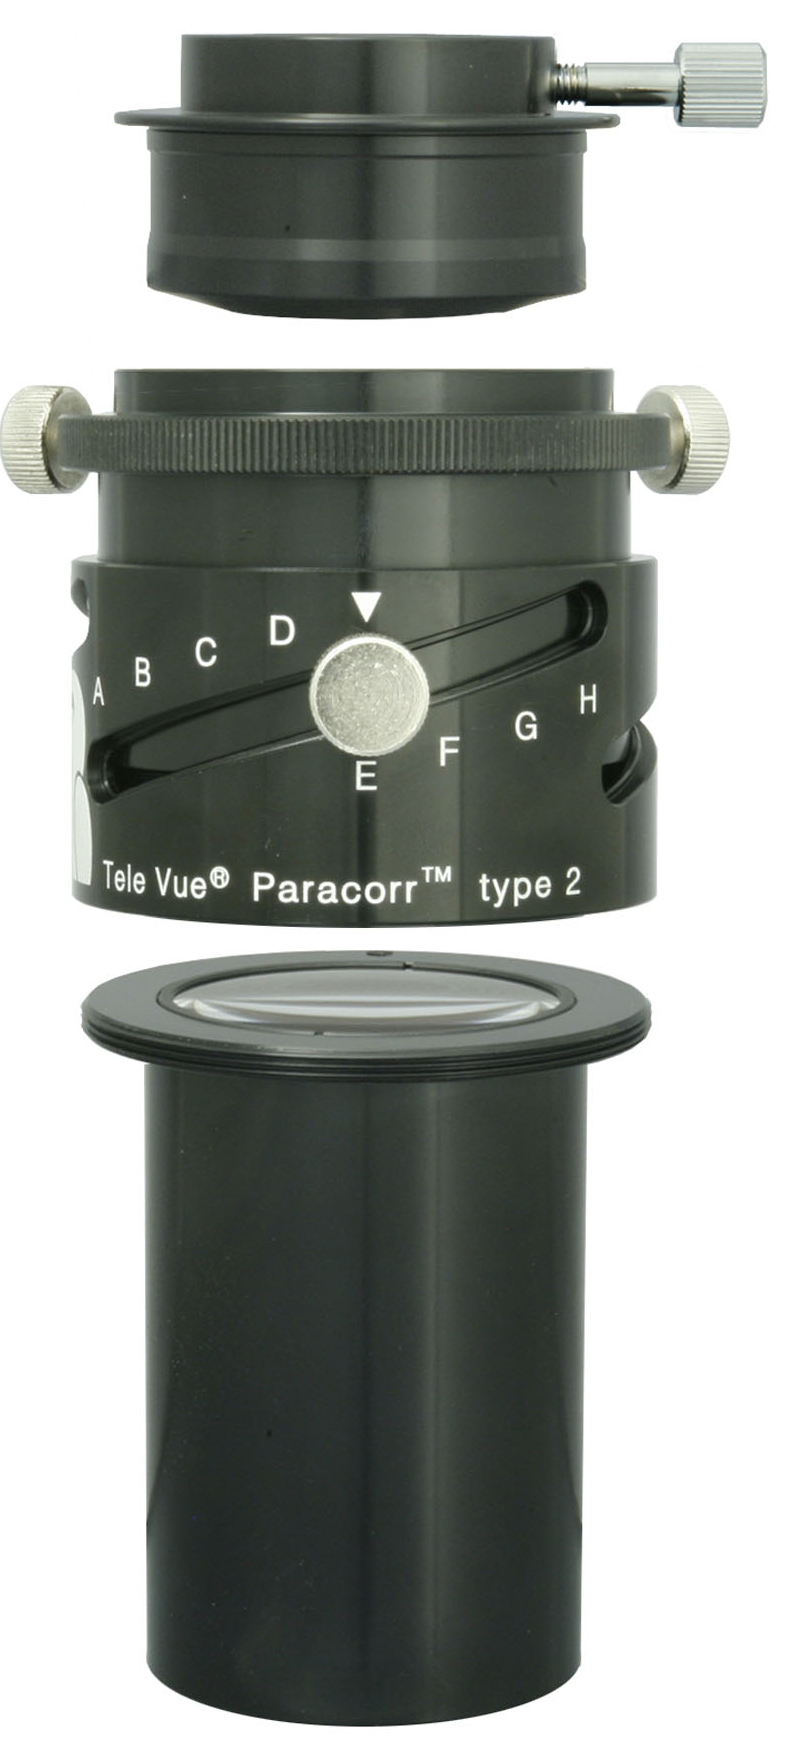
2″ Paracorr Type-2 For existing scopes with 2″ focusers, drop in our 2″ Paracorr Type-2 (VIP-2010, Visual-Imaging-Paracorr). This model works with 1¼” and 2″ eyepieces and can be used with our Imaging System accessories for astrophotography. It is recommended for chips up to 30mm on the diagonal (APC-C or typical “Crop Sensor”). This model includes a Tunable Top to accommodate a wide variety of eyepiece focus positions. Just look up your Tele Vue eyepiece on the table in the included instructions and twist the Tunable Top to its setting. Insert the eyepiece and use the telescope to focus. You’ll now have an edge-to-edge coma-free view!
For imaging, just remove the Tunable Top to reveal the Imaging System threads on the lens assembly. For DSLR cameras, connect Tele Vue’s Canon EOS Wide T (CWT-2070), Nikon F-mount Wide T (NWT-2073), or your camera T-Ring mated to our Standard T Adapter (TRG-1072) to the top of the lens assembly. For astro-cameras, refer to the Tele Vue Imaging System Accessory Table for adapters and spacers to achieve the proper back focus: approximately 56mm from top-glass face to sensor.
Starlight Integrated Paracorr System (SIPS) Building or upgrading a fast Newtonian/Dobsonian? Consider a Starlight Integrated Paracorr System (SIPS). It’s the 2″ Paracorr Type 2 optics integrated into a Starlight Instruments Feather Touch focuser — no Tunable Top required. Once installed, you simply adjust the focus knobs of your Feather Touch focuser to simultaneously achieve both focus and coma correction. The SIPS will fit 1.5″ travel, 2″ FeatherTouch focusers, or buy a complete focuser with SIPS included.
NOTE: If you are strongly near- or far-sighted and prefer to observe without your glasses, you compensate by using the telescope focuser. The difference in focus due to your eyesight will put the eyepiece in less than the ideal location for coma correction. In this case, the 2″ Paracorr Type-2 with a Tunable Top is a better choice over SIPS because it allows you to maintain coma correction independent of compensating the telescope’s focus for your eyes. If you do wear glasses while observing, SIPS will work for you and of course we suggest you choose long eye relief eyepieces.
2″ Paracorr Type-2 / SIPS Light Fall Off in your ultra-fast Dob?
The Fully Illuminated Field (FIF) in a Newtonian is a disc-shaped zone whose diameter is defined by the the largest field angle reflecting off the entire primary mirror to make it to the focal plane. For field angles lying outside this zone, the field is still illuminated but illumination diminishes gradually as field angle increases due to the vignetted rays not reaching the eyepiece. The table below gives the fully illuminated field for various f/# Newtonians (with 60″/1524mm focal length) when using the 2″ Paracorr Type-2.
f/2.5 – 14.0 mm f/4.0 – 27.9 mm f/3.0 – 22.4 mm f/4.5 – 29.8 mm f/3.5 – 26.0 mm f/5.0 – 31.6 mm
We supplied this data to Mike Lockwood of Lockwood Custom Optics and he included this table in his SIPS Setup and Facts page. He commented as follows (emphasis ours).
So, as you can see, that’s large enough for comfortable visual use down to f/2.5, and because our vision is not sensitive to a smooth falloff in illumination, we probably won’t notice that at low powers. I have never actually noticed illumination falloff in my 20″ f/3 or my 14.5″ f/2.55. Honestly, with high-quality optics most people don’t use enough power when they observe, and never get to see the detail and contrast that they should.
Go forth and set up your SIPS and enjoy the best coma correction that you can buy (for a reasonable price) for a fast Newtonian.
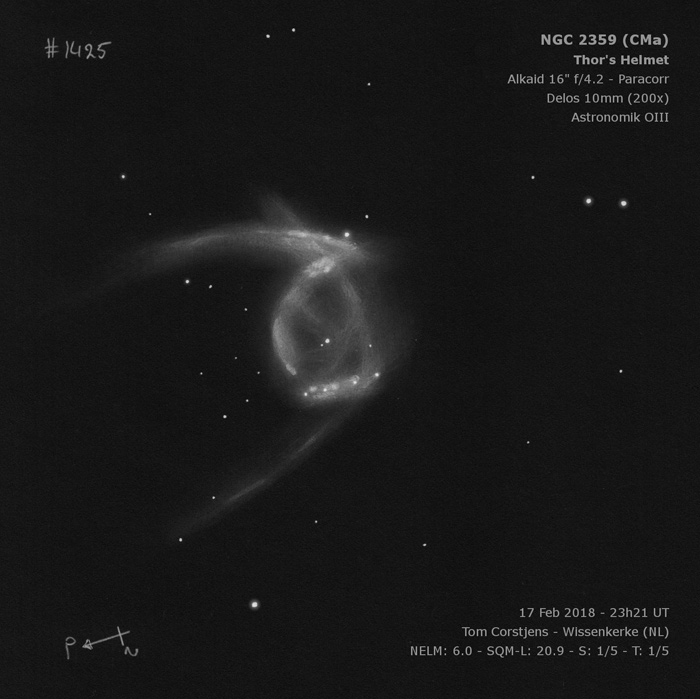
Thor’s Helmet by DeepskyLog user Tom Corstjens licensed by (CC BY-NC 4.0). Used by permission. Alkaid 16″ f/4.2 Dobsonian with Paracorr and 10mm Delos eyepiece using Astronomik OIII filter.
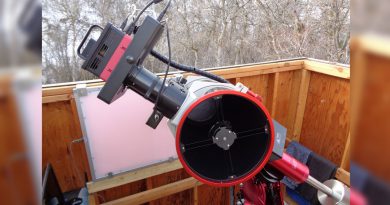
BIG Paracorr Type-2 (VIP-3010) is the 3″ version of the Paracorr designed for imaging with big camera chips. The back focus length has been extended to 80-mm to allow for additional accessories to be placed in the optical path.
3″ BIG Paracorr Type-2 The first and most important thing to know is that that the 3” BIG Paracorr (VIP-3010) is only really necessary for fast scopes when you’re imaging with chip/sensor sizes beyond 30mm diagonal. It is not at all necessary for visual use, even with the fastest of scopes. If, however, you are considering a fast Newtonian for imaging with a full format or larger chip, then the 3″ Paracorr will be worth the investment. Consider this quote from Dennis diCicco’s review of the 3″ BIG Paracorr Type-2 in Sky & Telescope magazine.
There is little question that I’m excited by the potential with the Big Paracorr. It clearly raises the imaging performance of humble Newtonian reflectors with fast primary mirrors to a level that can compete with today’s elite astrophotographs having exotic optical designs. And it also opens up a world of possibilities for “old-school” astrophotographers like me who got started in this hobby because we could build (and afford)the telescopes we used.
Installation Notes for Optimal Spacing of Your Camera to the 3″ Paracorr
Referring to the image below, the direction of the light path is from left to right. The “Image Surface without Paracorr” note at the center refers to the mirror’s native focal plane and the “Image Surface” at the “52.00 mm Ref. Image Circle” on the right is the 3″ BIG Paracorr’s focal plane. To position the 3″ BIG Paracorr correctly the image sensor must be positioned 80mm away from the center of the top glass surface of the Paracorr. This will place the sensor in the optimal position for coma correction. To calculate the proper spacer length, you have to deduct the path length of your imaging train from the focal surface distance to whichever Paracorr flange you choose to use (70.3mm using the Stop Flange or 73.3mm with the Stop Flange removed). If planning on using filters, remember to increase the distance to the image sensor by 1mm for every 3mm of filter thickness.
For constructing an attachment spacer, note that the top stop-flange has an inner thread diameter of 2.76″ x 24 tpi and an outer thread diameter of 3.40″ x 24 tpi. The flange is also removable to reveal an M73.5 x 0.75mm inner thread diameter on the 3″ BIG Paracorr lens barrel. You can use any of these threads to construct an attachment spacer between the 3″ BIG Paracorr and the imaging train. Just remember to use the appropriate distances from whichever flange thread you choose.
3″ BIG Paracorr Type-2 mechanical drawing. “Image Surface” is the mirror’s original focal plane. The right-side “Image Surface” is the BIG Paracorr’s focal plane.
Installation Notes for Proper Location of 3″ Paracorr in Your Focuser
As the above drawing shows. The vertex of the last lens surface should be 7.66mm from the telescope’s native focal plane. Slight deviation from this distance won’t affect correction too much. For practical purposes, the flange surface that rests against the focuser’s draw tube should be at 1.11mm inside of the telescope’s native focal plane.
Finally, with the 3″ BIG Paracorr mated to your imaging train, insert the assembly into the 3″ focuser of the Newtonian. Focus the system as you normally would. With all of the distances correct, you’ll have coma-free stars across a 52mm diameter image circle.
Installation Notes for Imaging at Prime Focus
The 3″ BIG Paracorr can also be integrated into a dedicated Newtonian astrograph design. In this usage, there is no secondary mirror or provision for visual use. A very stable holder must be constructed to support the weight of the 3″ BIG Paracorr and imaging train. In this configuration, with camera to the front of the scope and in line with the optical axis, a filter wheel would obstruct too much of the aperture in this system. A filter holder is recommended instead. Provisions for a shallow focuser should also be considered to fine-tune the focus.
Looking for a professional Dobsonian builder to include a Paracorr Type-2 or Starlight Instruments SIPS into your dream scope?
The following builders are authorized Tele Vue dealers.
We use cookies on our website to give you the most relevant experience by remembering your preferences and repeat visits. By clicking “ACCEPT”, you consent to the use of ALL the cookies.
This website uses cookies to improve your experience while you navigate through the website. Out of these, the cookies that are categorized as necessary are stored on your browser as they are essential for the working of basic functionalities of the website. We also use third-party cookies that help us analyze and understand how you use this website. These cookies will be stored in your browser only with your consent. You also have the option to opt-out of these cookies. But opting out of some of these cookies may affect your browsing experience.
Necessary cookies are absolutely essential for the website to function properly. This category only includes cookies that ensures basic functionalities and security features of the website. These cookies do not store any personal information.
Any cookies that may not be particularly necessary for the website to function and is used specifically to collect user personal data via analytics, ads, other embedded contents are termed as non-necessary cookies. It is mandatory to procure user consent prior to running these cookies on your website.